

What To Use As A Mouse Pad
Leap to How-To
You won't believe how easy it is to make your own mouse pad! A DIY mouse pad is such a budget friendly project, and you can customize information technology whatever manner you similar with your favorite scrapbook paper. Acquire how to exercise it hither.
Skills Required: Beginner. The process is really simple – yous'll demand to be able to cut paper and spread Mod Podge. This is a great arts and crafts for adults, older children, teens, tweens, etc.
Hello, I'm Courtney with Crafts by Courtney. I'm and so excited to be back at Mod Podge Rocks!! This place really does Stone! Last time I gave a makeover to a thrift store serving tray. This fourth dimension, I came up with some other super easy Mod Podge project for you guys . . .
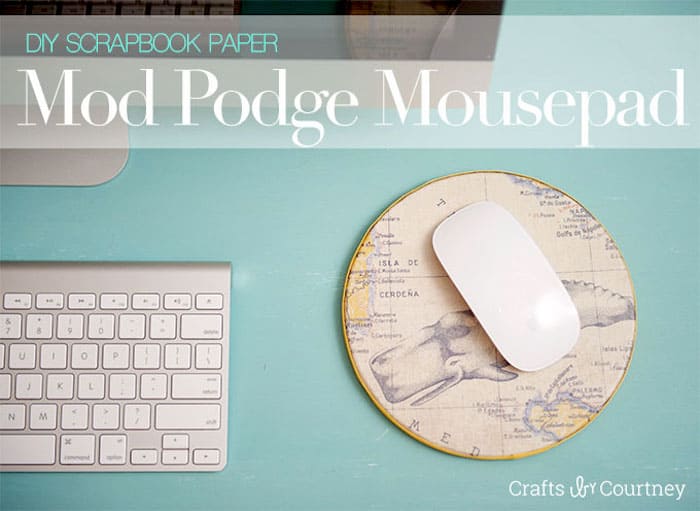
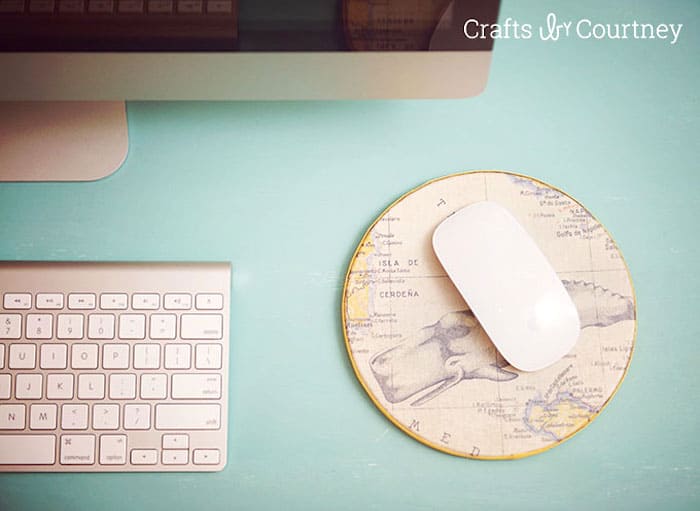
Make a Mouse Pad
A DIY mouse pad. Y'all won't even believe how easy it is to make your own mouse pad. You can have this project done in an afternoon. Information technology's a cracking craft for teens also as adults!
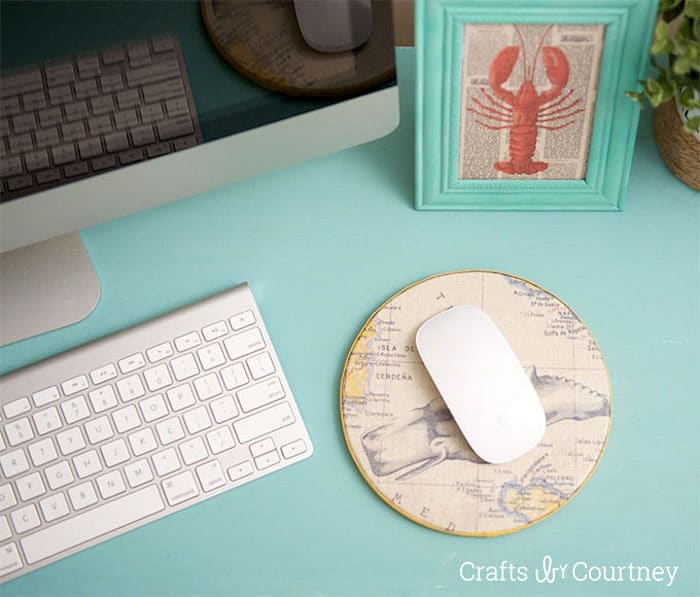
Of course, I had to give this decoupage idea my nautical touch to match my coastal desk-bound. Just for those of yous who are not into the whole nautical await, I made another one with some super cute patterns. The awesome affair about this project is that yous tin customize information technology whatever way you lot like.
Steps Y'all'll Follow
There are ii parts to this DIY mouse pad – the base and the peak. In this project, the base is a cork circle circular that you can get from the craft shop or online.
They are even at IKEA in a pack of multiples if y'all have one close by. The pre-cut cork circles make it really easy to make your ain mouse pad quickly! Yous want something that is large enough to be a mouse pad – at least 7.5″ round.
Another option for the base of operations is to cutting a circle out of paper-thin. It might non be as sturdy equally the cork circle depending on the blazon of cardboard you utilize.
You lot can trace your circle on the cardboard with a plate or other circular item. Y'all'll want to use a precipitous cutting pocketknife so that you take make clean edges.
As far as the acme of your DIY mouse pad, y'all tin use scrapbook newspaper, but you can also use textile.
For both scrapbook paper and fabric, y'all'll want to pick something a little thicker so that ane) information technology's easier to Modern Podge and ii) you can't run across the cork base through the surface.
Are you fix to larn how to make your ain mouse pad? Keep reading!
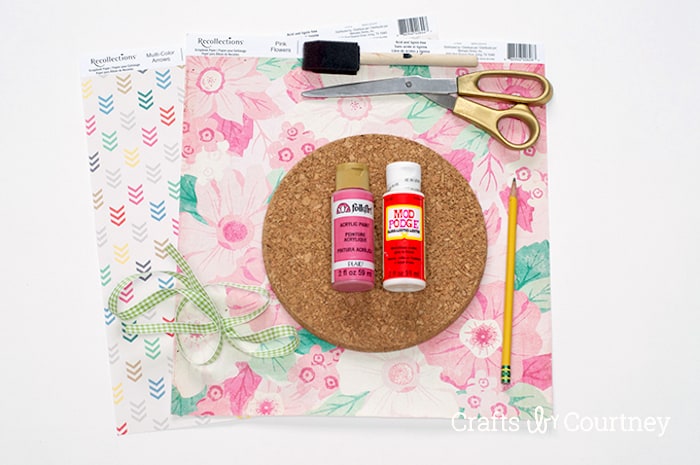
Assemble These Supplies
- Round cork circle – at least 7.5″
- Scrapbook paper
- Mod Podge Gloss
- Ribbon
- Acrylic paint
- Foam brush
- Pair of scissors
- Pencil
Getting Started
I rounded up all my supplies (lots of stuff from Dollar Tree), including some cool scrapbook paper and (of course) my trusty Modern Podge!! I couldn't wait to make my new mouse pad!!
Step 1 – Trace Cork Circle
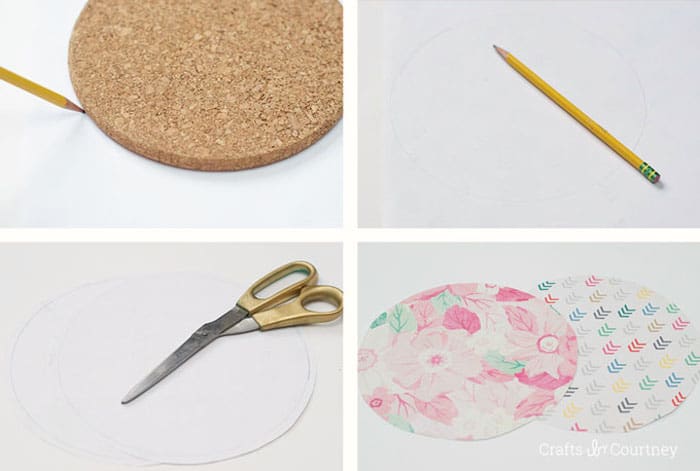
I plant this absurd round cork at IKEA, three in a pack for $2.99. Information technology was a full deal I couldn't pass it up. I traced out my circle on the back of the scrapbook paper, so cut out.
If you lot decide to use fabric for this project, you'll need to set up it beginning to exist easier to cut (similar paper).
Simply identify the fabric downwards on a piece of wax paper or silicone mat and paint a layer of Mod Podge over the summit. Let dry out. You'll be ready to trace and cut in about 30 minutes.
Quick Tip: When cut out your circumvolve, exit a piddling extra hanging over the sides.
Pace ii – Add together Scrapbook Paper
Now it'south time to add your fancy scrapbook paper! I covered the top part of the cork and the back of the scrapbook paper with some Mod Podge.
Then, I gently placed the paper on the cork.I smoothed down the top with my fingers to go along any bubbles from popping up. I also pressed the sides down. Let dry for 20 minutes.
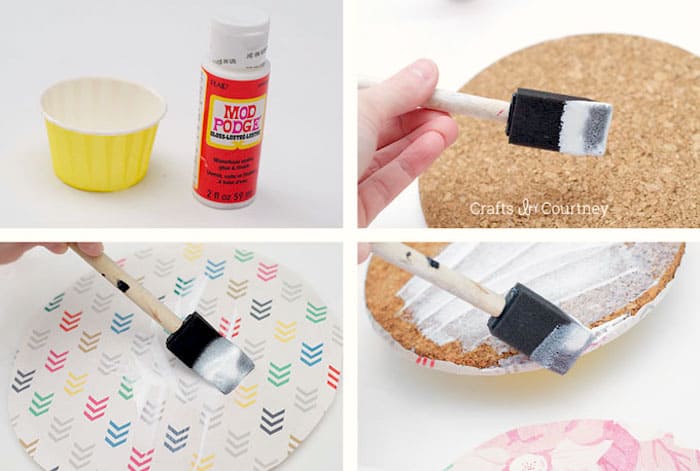
Lastly, I did the other side of the mouse pad the same way. I let dry another 20 minutes.
Step 3 – Add Your Ribbon
To give my mousepad that extra detail, I decided to add some ribbon effectually the edge. Merely, I didn't take the perfect colour I wanted. So the side by side best thing . . . PAINT!!
I just painted the ribbon on both sides with my choice color. And so easy to do, and information technology's a little trick I apply all the time when I don't have the ribbon I need.
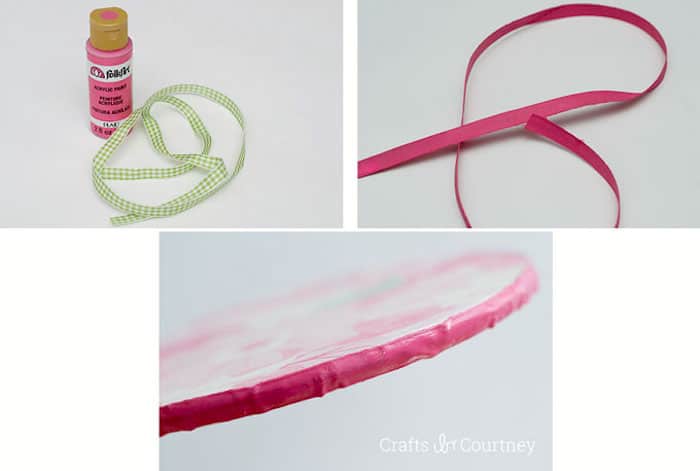
Add together the ribbon to the border of your mouse pad. I covered the ribbon in Modern Podge and started wrapping it around the side of my mouse pad. The Mod Podge keeps it in place perfectly!
Step four – Finishing Touches
Finally, I let everything dry for 30 minutes (just to be safety). You can use it right abroad, merely it feels tacky subsequently drying, you tin also seal it with a brush on or acrylic spray sealer.
I love that I decoupage both sides of my DIY mouse pad – so I can change it upward easily for whatever mood I'g in! I can become nautical, trendy, or super girly.
Sorry honey – I didn't make a "manly" mousepad. You tin utilise the whale version I also fabricated 🙂
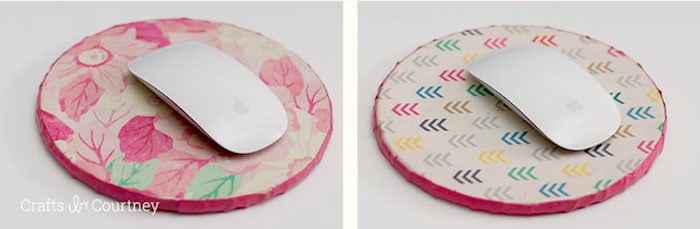
And then, I'1000 seriously in Honey with how it turned out. I didn't terminate up taking pictures of the other side, but it has a really cool starfish blueprint on it.
I had my new nautical themed DIY mouse pad done in no fourth dimension. I but love a quick and easy project like this. And the best role, I already had all the supplies on paw.
So run out to your closest IKEA and grab some of these absurd corks. Believe me, I have more ideas I desire to do with them! I'1000 giving my new office a consummate coastal makeover!!
Prep Time 10 minutes
Active Time thirty minutes
Full Fourth dimension 40 minutes
Difficulty Easy
Estimated Cost $2
Materials
- Round cork circle - at to the lowest degree seven.5"
- Scrapbook newspaper
- Modernistic Podge Gloss
- Ribbon
- Acrylic paint
Tools
- Foam brush
- Scissors
- Pencil
Instructions
- Trace your cork on the scrapbook paper and cut out.
- Embrace the top part of the cork and the dorsum of the scrapbook paper with Modern Podge.
- Gently place the paper on the cork, center, and smooth downwardly. Permit dry for xv - 20 minutes.
- Repeat on the other side of the mouse pad.
- Add ribbon around the border with hot glue or craft glue. Let dry out completely earlier using.
Another Large Cheers to Amy for having me back. I can't await to share fifty-fifty more projects with your readers!
If you enjoyed learning how to make a mouse pad with cork circles, here'south another craft you might like: DIY cork boards! You tin too check out these other ideas:

What To Use As A Mouse Pad,
Source: https://modpodgerocksblog.com/diy-mouse-pad-with-scrapbook-paper/
Posted by: marquezgraime.blogspot.com
0 Response to "What To Use As A Mouse Pad"
Post a Comment